In this tutorial, you will learn how to achieve the following fancy 3D typography effect using Adobe Illustrator and Adobe Photoshop in just a couple of steps.

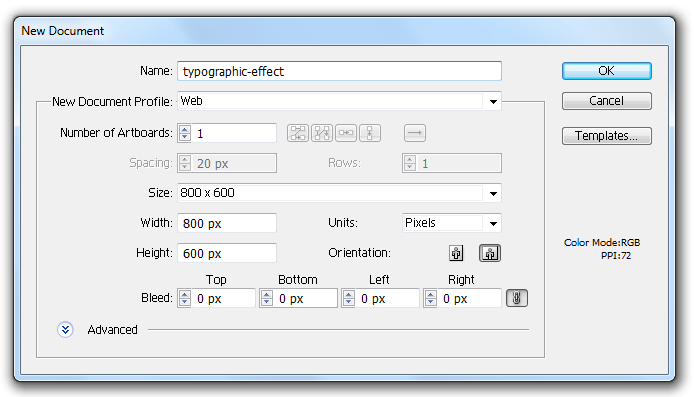
1.Open Adobe Illustrator and create a new .ai file:
2.The Type tool
Select the Type Tool(T) and add the red text using these settings and the #B3B3B3 color:
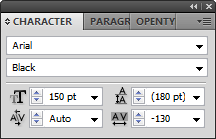
If you don’t see the Type window you can bring it to the front using the top menu using Window > Type > Character.
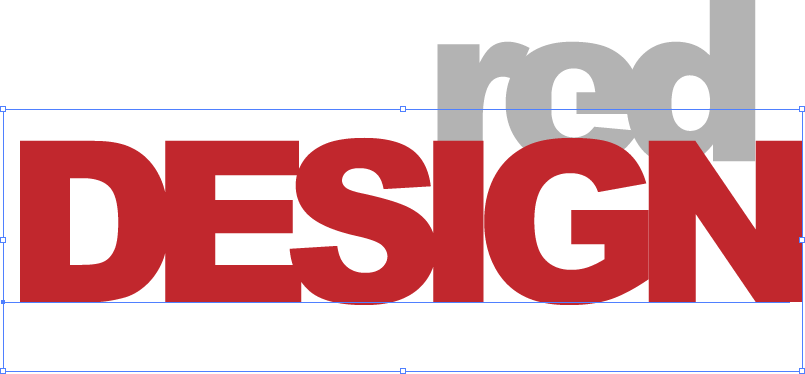
Below is the result you must achieve, note the reduced spacing between the letters:

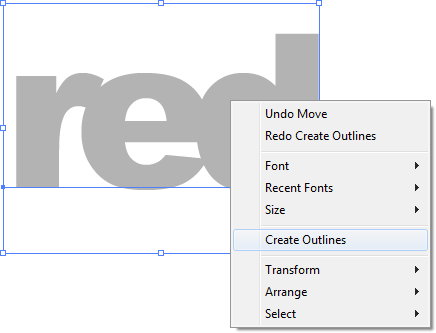
To continue customizing this text, right-click on it and select Create Outlines to transform the text into editable shapes.
3.Customize the text
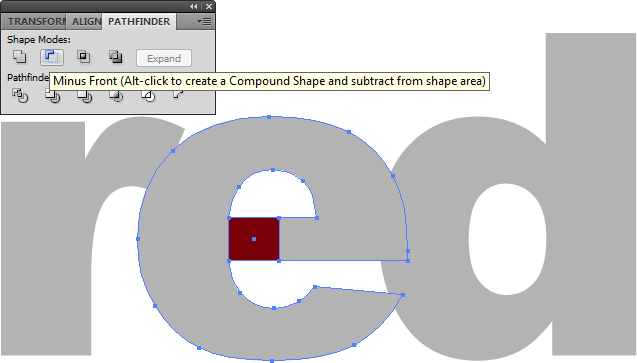
First, create a new shape using the Rectangle Tool (M) like in the following example:

Now with the Pathfinder window activated (Shift+Ctrl+F9 or Window > Pathfinder), select the new square shape and the “e” shape from the “red” text and click on “Minus Front” as showed:
The result after we use the Pathfinder will look like this:

4.Add the design text
Note that the type settings are the same as I used for the “red” text, just that in this case the letters are capitalized.
5.Use the Pathfinder again
Use it as shown earlier to “cut” the “red” text and make it look like this:

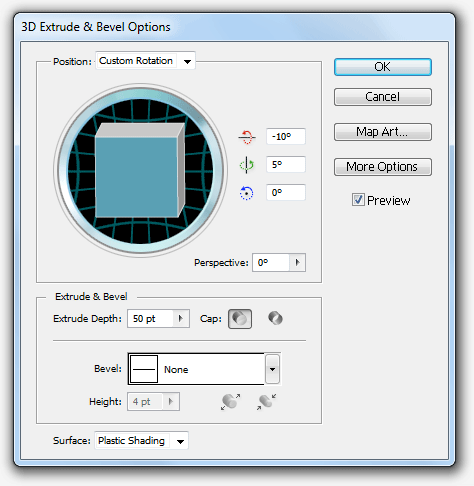
6.Extrude & Bevel
With the “DESIGN” text selected from our layer palette go to Effects > 3D > Extrude & Bevel and apply these settings to add a 3D effect to the text:

7.Stylize with Adobe Photoshop
Export the content as .png and open it with Adobe Photoshop. You need now to create custom shapes to add lights and shadows to the design. To do that just select the Pen tool (P) from the left menu and start creating shapes as shown. Select the #ffffff color as the background and reduce its opacity to, let’s say, 20%.

This should be the result after adding lights:

Plus some shadows:

That’s it!
I hope you enjoyed this tutorial. Below you can find the final result.