In this tutorial, you’ll learn how to create a love heart wallpaper using Photoshop’s Stroke path and Pen tool.

New Photoshop document file
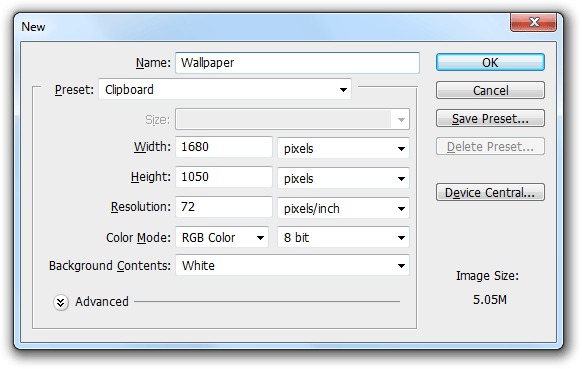
In order to start designing we must create a new 1600x1200px Photoshop file and after doing that you must fill the background with #316b94 color:

Create a custom pattern
Now we’ll create a 5x5px pattern to use it for our background:
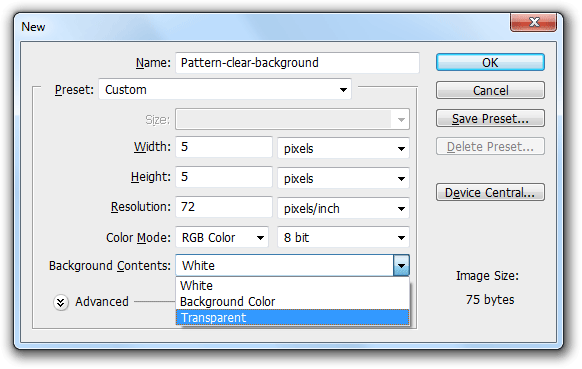
Now you must zoom 100% (press Z on your keyboard and click several times or use Ctrl+ several times) on the new pattern 5x5px file and you should have this on your screen:

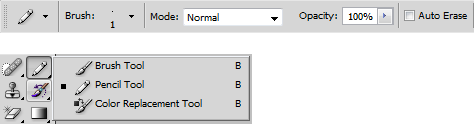
Select the Pencil Tool(B)
Hold down the left mouse button and choose the second option from the list and after please check you have the following settings for your pencil brush:
Start creating the pattern
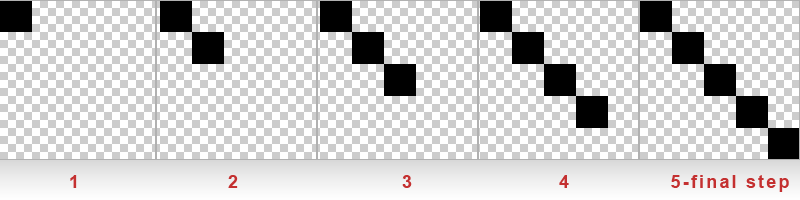
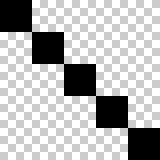
From the top-left corner to right-bottom corner start drawing 1pixel:
Define Pattern
From the top horizontal menu select Edit(Alt+E) and further choose Define Pattern. Congratulations, you just learned how to create a custom pattern.
Add styles to your background
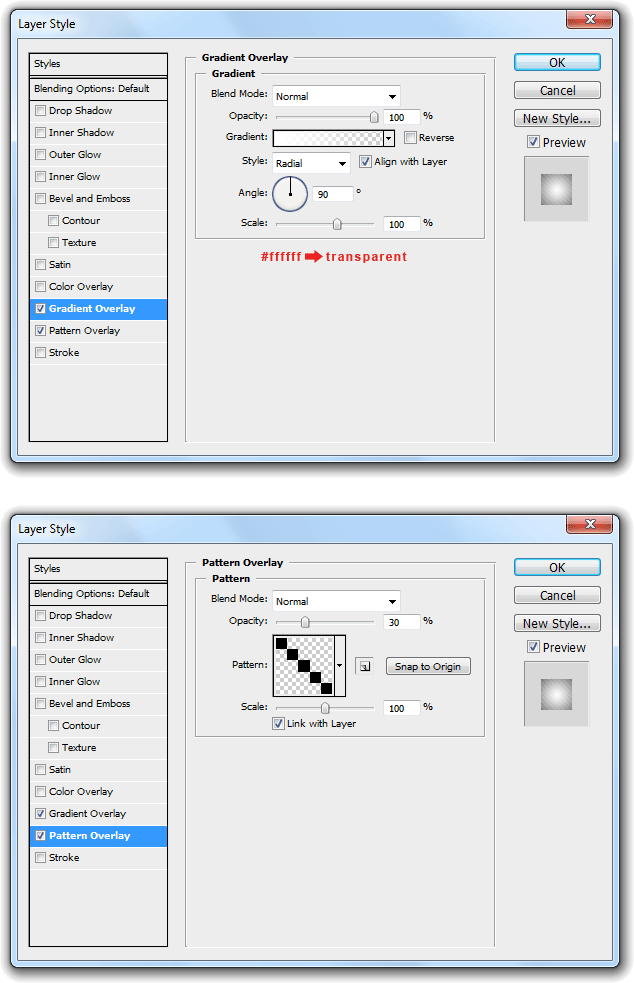
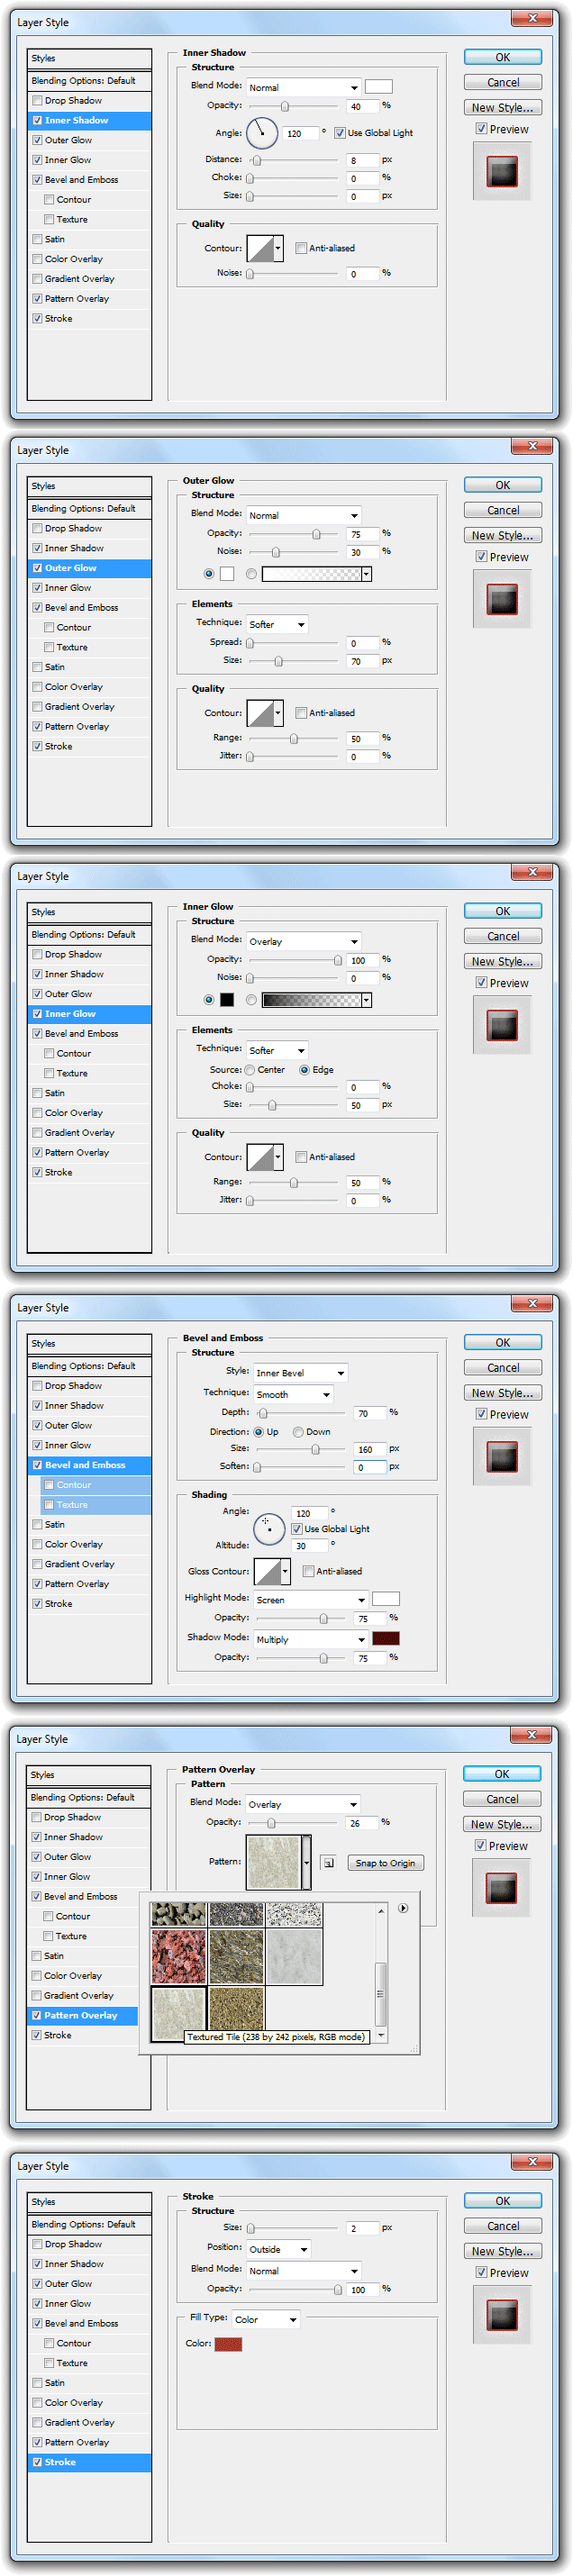
With the pattern you’ve just created go to Blending options and add the following styles:
The background should look like this:

Design the wings
Now we have the background we should go further and add our two wings.
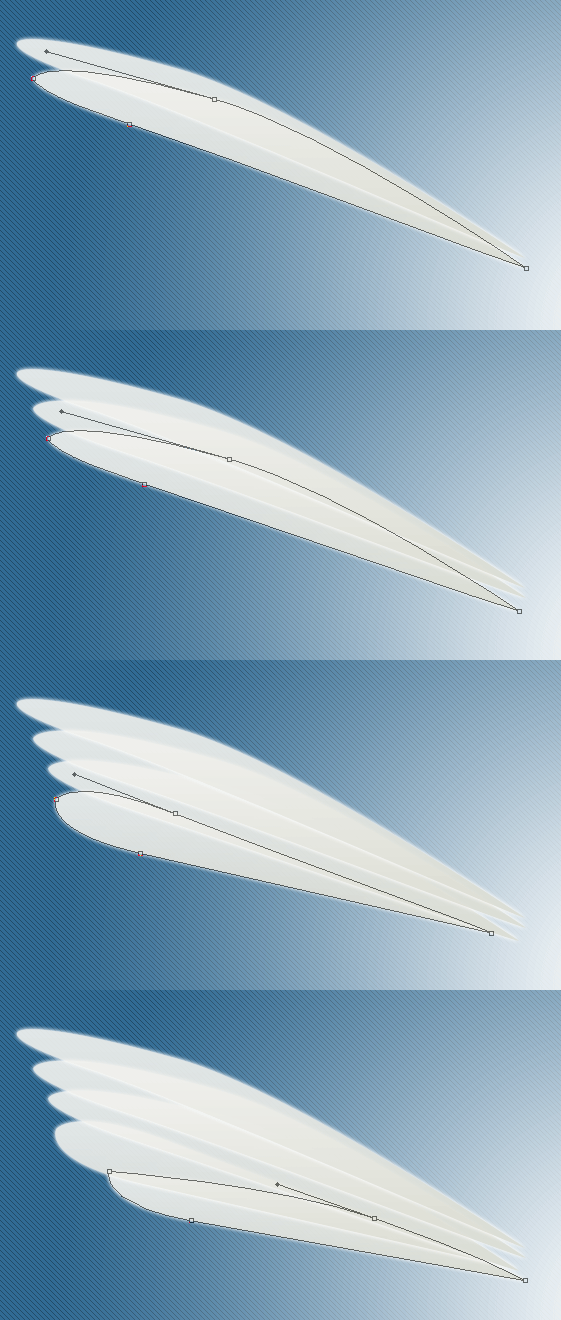
Start creating feathers
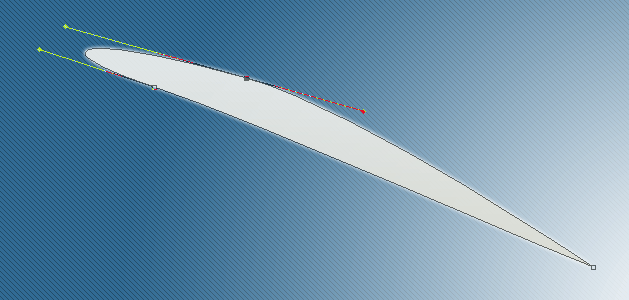
You must select Pen Tool and start adding points until you create a shape like this one:
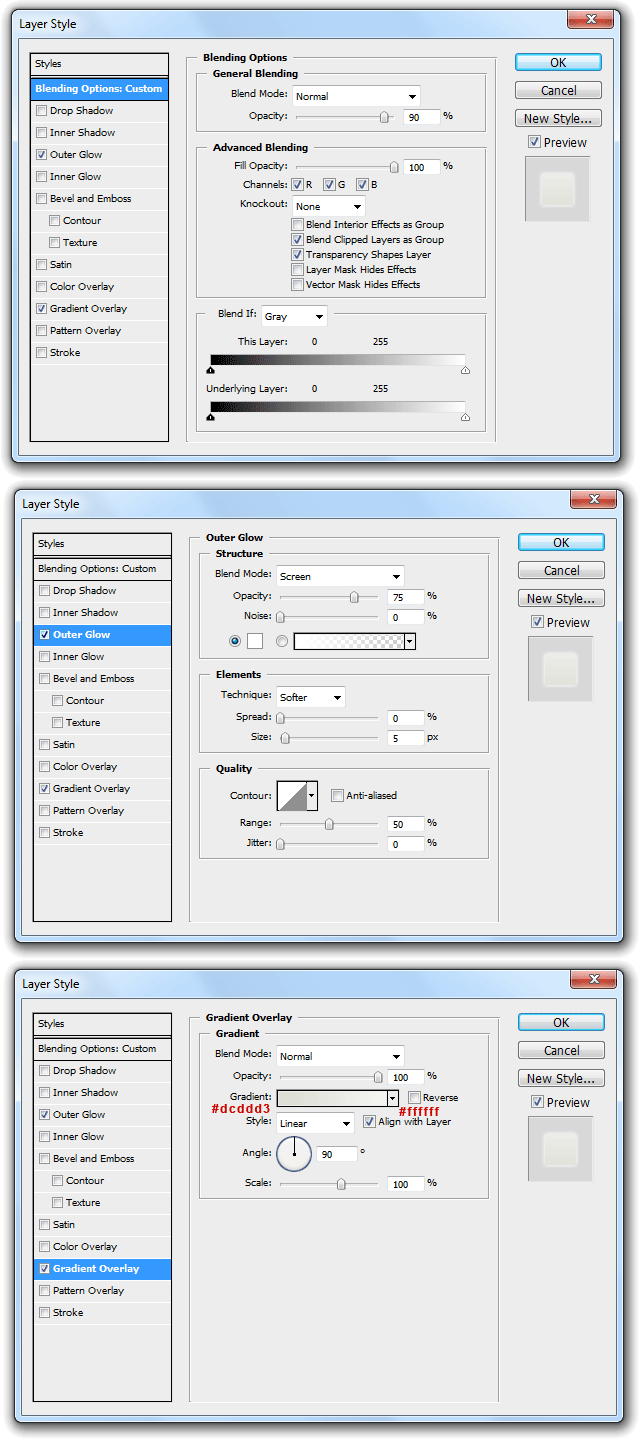
Then add the following effects:
Add more feathers
Place more feathers using slight different shapes with same blending options until you achieve a wing…you should overlap them as it’s shown below:
This is why you should achieve by placing feathers one by one:

Duplicate the left wing design
After you’ve created the left wing design, duplicate the layers you used for it and having all duplicated layers selected go to Edit->Transform and Flip Horizontal. A tip for you is to group layers for easier management of layers.

Create a heart
Create a heart with Pen Tool or you can choose heart symbol from custom shapes.

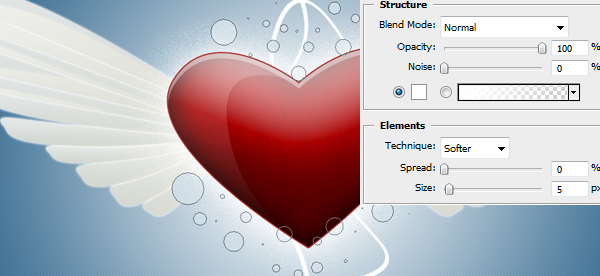
Add the following effects:
And you will have:

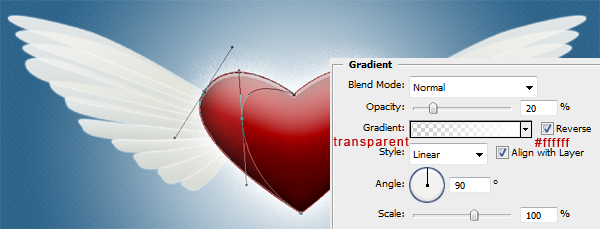
Add a new layer like this and use the following gradient:
Add abstract shapes and lines
Selecting Pen Tool and Path instead of Shape Layers you must create a custom path like the one bellow and then apply a stroke path with the following brush settings:
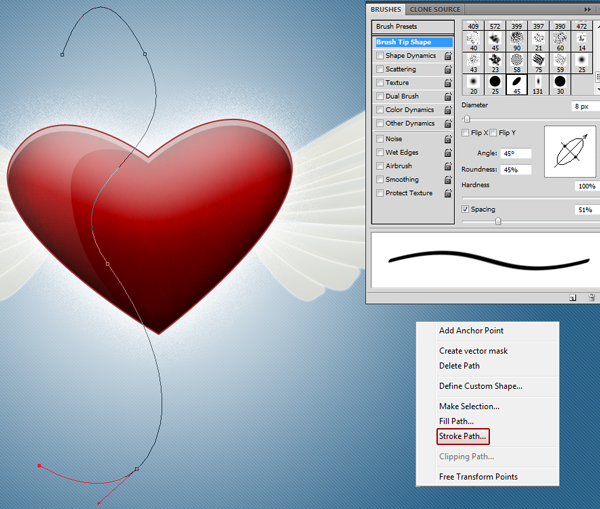
This is my result I achieved using two stroke paths but yours can be different, depends on what stroke path you’re creating:

Add glowing circles
Select the Ellipse Tool (U) and holding down the Shift key create several circles like in this figure and place them behind heart shape, then apply the Outer Glow effect.
Repeating the last step add more circles for the final step, vary their blue color and place them in the right-bottom corner: